How to Do a French Manicure at Home: A Step-by-Step Guide
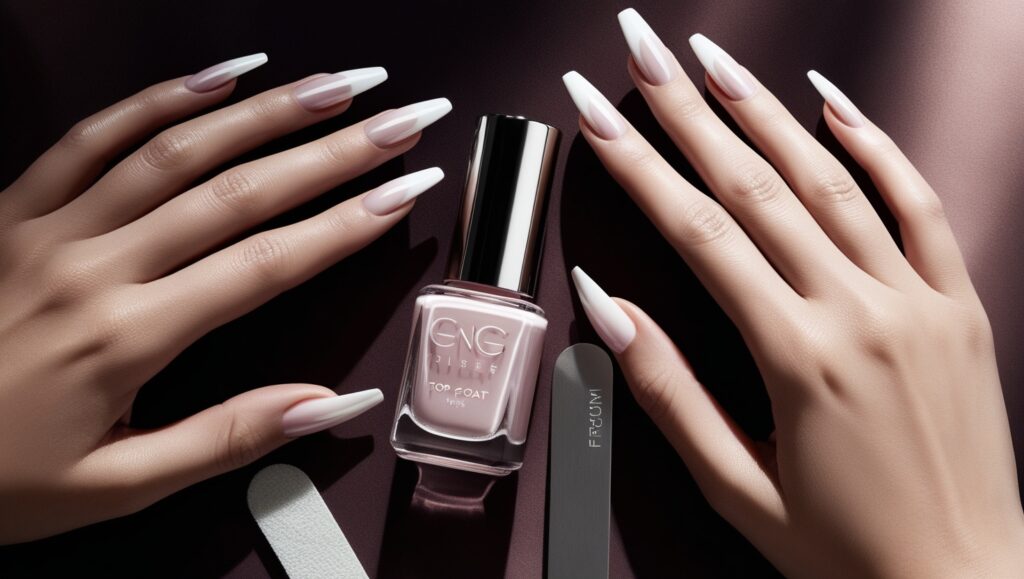
Have you ever wanted that perfectly polished, classic French manicure without the salon price tag? We’ve all been there—admiring the sleek white tips and soft pink base that scream elegance, only to realise we don’t want to spend hours and money at the salon.
Here’s the good news: you can do a French manicure at home and make it look just as good as the one you’d get at a professional nail salon. And I’m going to show you exactly how to do it. No complicated tricks, no unnecessary jargon—just simple steps to get that flawless look.
Let’s get into the process.
Prepping Your Nails for a French Manicure
Before we dive into applying the white tips and base colour, the foundation is key. Prepping your nails the right way sets you up for success, and it makes the polish last longer.
1. Clean Your Nails Thoroughly
First things first: make sure your nails are clean. If you’ve got any old polish lingering on your nails, grab some nail polish remover and wipe it off completely. This gives you a clean canvas to work on.
Once the polish is gone, give your nails a quick wash with warm water and soap. Dry them thoroughly because you need a dry surface for the polish to adhere to.
2. Trim and Shape Your Nails
Now that your nails are clean, it’s time to trim them. Use nail clippers to cut them to your desired length. French manicures typically look best on nails that are a bit longer, but not too long.
Once trimmed, grab a nail file and shape your nails. For a French manicure, a classic square or squoval shape works well. File your nails in one direction to avoid splitting and keep the edges smooth.
3. Buff and Smooth the Surface
This step is super important if you want to avoid ridges or bumps in your polish. Buffing your nails creates a smooth surface for the polish to glide over. Use a nail buffer to gently smooth out the surface of your nails. Don’t overdo it—just a few passes over each nail should do the trick.
Buffing also helps your base coat stick better, which means your French manicure will last longer without chipping.

Applying the Base Colour
Once your nails are prepped and ready, it’s time to start with the base colour. The key to a French manicure is that soft, natural-looking base.
1. Choose the Right Base Colour
For a classic French manicure, you’ll want to use a nude, pale pink, or beige polish. This gives your nails that clean, polished look while letting the white tips stand out.
Pick a colour that complements your skin tone. If you’re not sure, go with a sheer pink—it’s a safe option for most skin tones.
2. Apply a Thin Base Coat
Before you apply your colour, don’t skip the base coat. This step helps protect your natural nails and gives the polish something to hold onto. A base coat also prevents the colour from staining your nails.
Once your base coat is dry, apply your nude or pink polish. The trick is to keep the layers thin. Apply one coat, let it dry, and then apply a second coat if needed. Thin layers dry faster and smoother, which is key if you want to avoid smudges.
Creating the Perfect French Tip
Now for the fun part: the French tip. This is where most people get nervous, but don’t worry—I’ll show you an easy way to get those crisp, white tips without the mess.
1. Use Tape or Nail Guides for a Clean Line
If you’re like me and can’t draw a straight line to save your life, nail guides or tape are going to be your best friend. These handy little tools help create a clean, even line for the French tip. You can find French manicure guides at most beauty stores, or you can simply use household tape.
- Cut small pieces of tape or apply the guide just below the tip of your nail, leaving the part you want to paint exposed.
- Make sure the tape is secure, but don’t press too hard—you want to remove it without pulling the polish off.
2. Apply the White Polish
Grab your white nail polish and carefully apply it to the tips of your nails. Start from one side and swipe across to the other in a smooth motion. You want to follow the natural curve of your nail, but don’t stress if it’s not perfect—that’s where the tape comes in handy.
Let the white polish dry for a few minutes. If you want a more opaque look, you can apply a second coat, but make sure the first coat is fully dry before layering.
3. Remove the Tape or Guides Carefully
Once the white polish is dry, gently peel off the tape or guides. You should be left with a perfect French tip. If there’s any polish that bled under the tape, don’t worry! Just dip a small brush in nail polish remover and clean up the edges.
Sealing the Manicure with a Top Coat
The last step to your at-home French manicure is applying a top coat. This is what will make your nails look shiny, smooth, and, most importantly, keep your polish from chipping.
1. Apply a Top Coat Over the Entire Nail
Once your French tips are dry, apply a generous amount of clear top coat over the entire nail, including the tips. The top coat will blend the base colour and the white tips, giving you that seamless French manicure look.
2. Clean Up the Edges
No matter how careful you are, there’s always a chance some polish ends up on your skin or cuticles. That’s okay. Grab a small angled brush or cotton bud dipped in nail polish remover and carefully clean up the edges around your nails.
Now, your French manicure should be looking polished, sleek, and professional!
Bonus Tips for Perfecting Your At-Home French Manicure
While we’ve covered the basics of how to do a French manicure at home, there are a few more tips to keep in mind if you want to make it last and look flawless.
1. Be Patient Between Layers
I get it—you want to finish your nails and get on with your day. But rushing between layers is a recipe for smudging and uneven polish. Make sure each layer—whether it’s the base coat, the colour, or the top coat—is completely dry before moving on to the next.
2. Invest in Good Quality Polishes
It’s tempting to use whatever nail polish you have lying around, but for a long-lasting French manicure, quality matters. Invest in high-quality base coats, white polish, and top coats. Trust me, they’ll last longer, apply smoother, and make a big difference in the final look.
3. Moisturise Your Hands and Nails
Once your French manicure is done, don’t forget to keep your hands and nails moisturised. This helps prevent chipping and keeps your nails looking fresh. Use a good hand cream and massage it into your cuticles for extra hydration.
And there you have it! That’s exactly how to do a French manicure at home—simple, straightforward, and with all the tools you need to nail it (pun intended). Once you get the hang of it, you’ll wonder why you ever bothered paying salon prices.
How to Do a French Manicure at Home: Advanced Tips for a Salon-Quality Finish
So, you’ve nailed the basics of how to do a French manicure at home, and now you’re ready to take it up a notch. Let’s talk about refining your technique, adding longevity to your manicure, and dealing with those little issues that might pop up along the way. Because let’s be real—doing your nails at home can feel tricky, but with the right approach, your French manicure will look like you just stepped out of the salon.
Perfecting the French Tip: More Precision, Less Stress
Let’s face it—getting that perfect French tip can be nerve-wracking. If the line isn’t straight or if it’s too thick, the whole look can feel off. Here’s how you can make sure your French tips are sharp, clean, and perfect every time.
1. Use a Thin Nail Art Brush for Precision
While tape and nail guides are great, sometimes you need a little more control. Using a thin nail art brush allows you to manually paint on the white tip with precision.
How to do it:
- Dip the thin brush into your white nail polish.
- Start from the edge of the nail and slowly sweep the brush across the tip in a smooth curve.
- Keep a steady hand and avoid overloading the brush with too much polish.
This is especially handy if you like a customised French tip, whether you prefer a thinner or thicker line.
2. Correct Mistakes with a Clean-Up Brush
Even pros make mistakes, and that’s fine! If your French tip isn’t as clean as you’d like it to be, you can always fix it with a small clean-up brush and some nail polish remover.
Just dip a thin brush into remover and carefully clean up the edges where the white tip may have bled or gone too far. It’s a simple hack that makes your French manicure at home look flawless.
Making Your French Manicure Last Longer
One of the biggest questions people have is, “How do I make my at-home manicure last?” Whether you’re using traditional nail polish or opting for a gel French manicure, the goal is to keep it chip-free and looking fresh.
1. Seal the Tips with a Top Coat
This step is crucial. When applying your top coat, don’t just swipe over the nail—make sure to seal the tip. That means running your brush horizontally over the very tip of your nail.
Why this works:
- Sealing the tip prevents the polish from lifting or chipping.
- It creates a barrier that keeps the white tip intact for longer.
2. Use a Quick-Dry Top Coat for Efficiency
If you don’t have time to sit around waiting for your nails to dry, invest in a quick-dry top coat. Not only does it speed up the drying process, but it also adds an extra layer of protection to your French manicure, making it last longer.
Pro tip: Apply a fresh layer of top coat every couple of days to extend the life of your manicure.
3. Wear Gloves When Doing Chores
Water and harsh cleaning products can break down your manicure faster than you think. If you want your French manicure at home to last, wear rubber gloves when doing household chores like washing dishes or cleaning.
Simple fix, right? It keeps the polish from being exposed to chemicals that weaken the nails and cause chipping.
Customising Your At-Home French Manicure
The classic French manicure is iconic, but if you want to switch it up and make it your own, there are plenty of ways to get creative with your French tips without losing that elegant vibe.
1. Coloured French Tips for a Bold Look
Who says your French tips have to be white? If you want to add a bit of flair, try using coloured polish for the tips. Pastels, neon shades, or even metallics can give your French manicure a modern twist.
How to do it:
- Follow the same technique with the tape or nail guides, but instead of using white, grab a fun colour for the tips.
- Make sure to choose a nude or neutral base so the coloured tips pop.
2. Try a Reverse French Manicure
A reverse French manicure swaps the position of the white tip for a white (or coloured) base at the cuticle. It’s a simple flip but gives a trendy, unexpected look.
Steps:
- Paint the entire nail in your desired colour first.
- Use a nail guide to create a half-moon shape at the base of your nails, then fill in with a contrasting colour.
This gives you the elegance of a French manicure but with a fresh, modern twist.

Troubleshooting Common French Manicure Problems
Even when you know how to do a French manicure at home, you’re bound to run into some issues now and then. But don’t worry, these problems are easy to solve.
1. Dealing with Smudges or Dents
We’ve all been there—you think your nails are dry, and then you accidentally bump into something, leaving a smudge or dent in your fresh polish.
Fix: If the smudge is minor, dip your finger in nail polish remover and gently press down to smooth it out. If it’s a bigger dent, wait for the polish to dry, buff it lightly with a nail buffer, and reapply a thin layer of polish.
2. Uneven French Tips
Your French tips might not always come out even, but it’s easy to fix. Use a nail file to gently shape the tip and even out any inconsistencies. Just make sure to reapply the top coat afterward to seal everything in.
Enhancing Your At-Home Manicure Routine
Now that you’ve mastered the French manicure at home, let’s talk about upgrading your routine to make it easier and more enjoyable. The little things make all the difference.
1. Invest in a Nail Lamp for Gel Manicures
If you want your French manicure to last even longer, consider using gel polish and a UV/LED nail lamp. Gel manicures are more durable and give you that perfect shine that lasts for weeks.
How it works:
- After applying each layer of polish (base, colour, and top coat), cure your nails under the lamp for 30-60 seconds.
- Gel polish stays chip-free for up to three weeks!
2. Keep Your Tools Organised
It’s a simple thing, but having all your tools in one place can make doing a French manicure at home so much easier. Get a small box or organiser where you can keep your nail clippers, files, buffers, and polishes neatly stored.
At this point, you should be feeling confident about how to do a French manicure at home and keep it looking salon-perfect. With the right tools, a little patience, and these advanced tips, you’ll have flawless French tips every time you want that classic, elegant look.
