Halloween is just around the corner.
Everyone’s excited, costumes are getting ready, and, of course, you’re thinking: “How do I make my nails look spooky without spending hours at the salon?”
I get it.
You want those Halloween nail designs to pop. But here’s the thing – simple Halloween nail designs at home can look just as good, and they’re easy to pull off. No professional tools needed.
Let’s break down exactly how you can achieve these designs in no time, with stuff you probably already have.
Essentials for Creating Halloween Nail Designs at Home
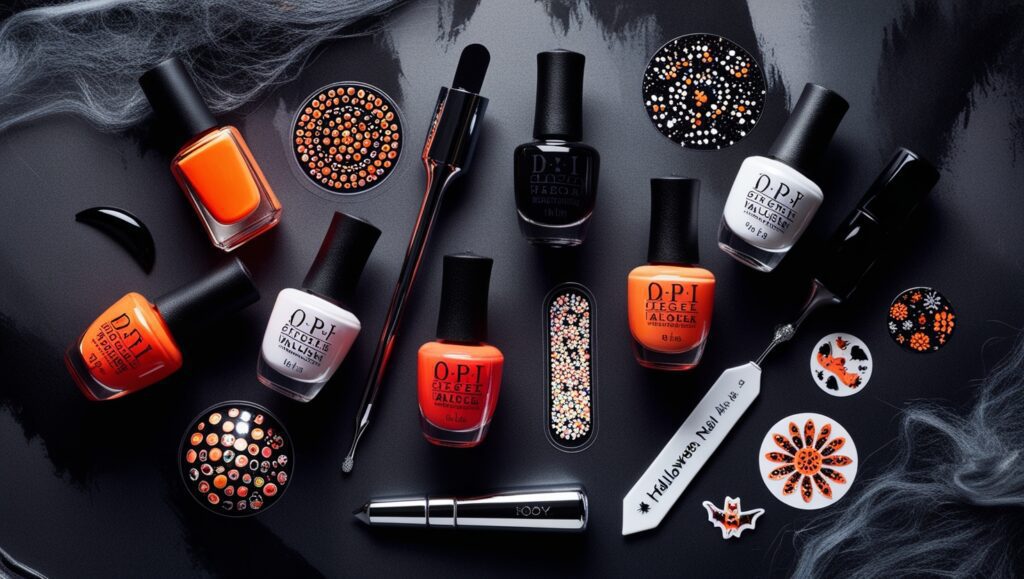
Before you start, you need to make sure you’ve got your nail art tools lined up. Don’t worry, you won’t need a massive collection.
Here’s what you’ll need:
- Nail polish in Halloween colours: Think black, orange, purple, white – the classics.
- Base coat and top coat: This keeps your design smooth and long-lasting.
- Dotting tools or toothpicks: Perfect for adding small details like dots or spiderwebs.
- Thin brush: Useful for drawing intricate lines, but if you don’t have one, a bobby pin works too.
- Nail stickers or decals: Great if you want to keep things really simple and avoid hand-drawing designs.
You don’t need to go overboard. Stick to the basics, and you’ll be creating easy Halloween nail designs in no time.
Step-by-Step: How to Create Simple Halloween Nail Designs at Home
1. Pumpkin Nail Design
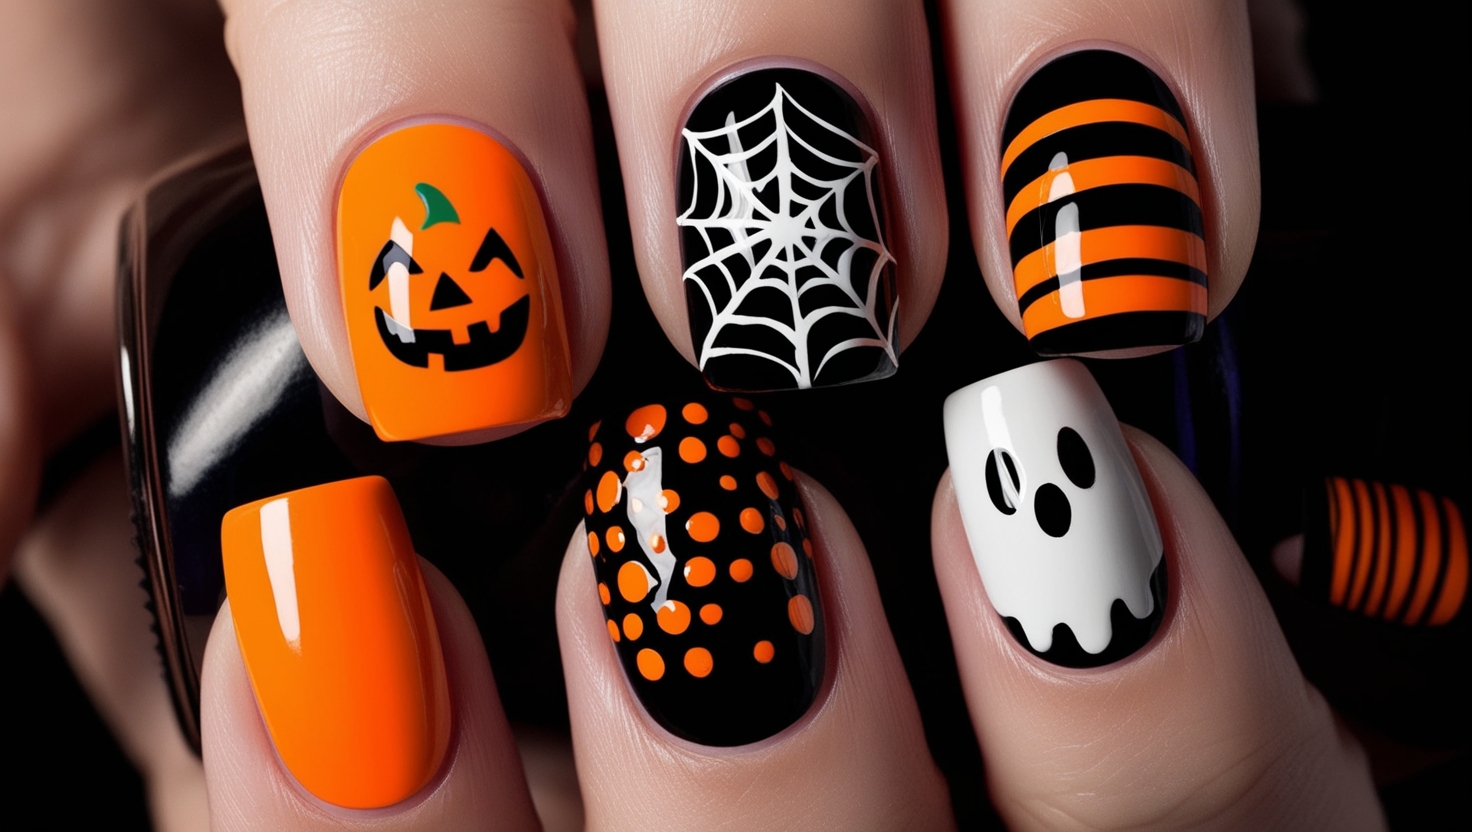
Pumpkins and Halloween go together like peanut butter and jelly. Luckily, pumpkin nails are one of the easiest Halloween designs you can do at home.
Here’s how:
- Apply a base coat. This protects your natural nails.
- Paint your nails with orange nail polish. This is the base colour for your pumpkins.
- Use a toothpick or thin brush dipped in black nail polish to draw the outline of a pumpkin face on an accent nail (usually the ring finger).
- Want to keep it extra simple? Skip the face and just draw a few vertical lines on the orange polish to mimic the pumpkin’s shape.
- Finish with a top coat to keep your pumpkins looking fresh all Halloween week.
Pumpkins are fun, classic, and super easy to create at home. Plus, it gives you that Halloween vibe without over-complicating things.
2. Spiderweb Nail Design
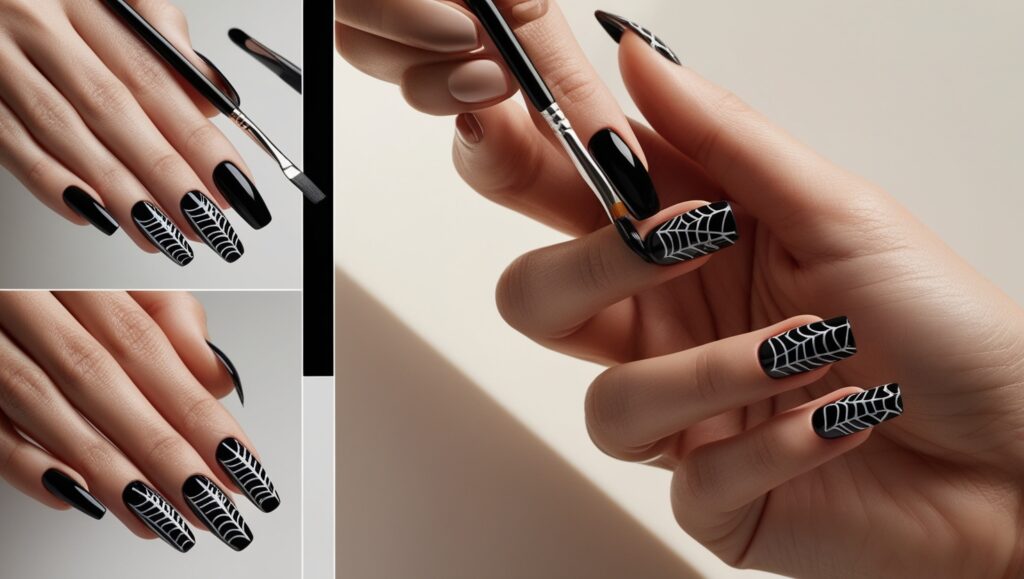
Feeling spooky? Spiderweb nails are a step up in difficulty but still totally doable, even if you’re a beginner.
Here’s how to get that webbed look:
- Start with a black base coat. Let it dry completely.
- Use a thin brush or a toothpick to draw three or four diagonal lines from one corner of the nail.
- Now, connect the lines with small curved lines, starting from the corner and working your way outwards. It should start to look like a web.
- Add a little glitter if you want your webs to sparkle under the moonlight.
- Seal it with a clear top coat to protect your design.
Spiderwebs are the perfect way to give your nails a subtle yet spooky touch, and they pair well with just about any Halloween outfit.
3. Ghost Nail Design
Ghost nails are probably the easiest, but they make a big statement. If you’re pressed for time, this design can be done in under 10 minutes, start to finish.
Here’s how to create simple ghost nails:
- Apply a base coat and let it dry.
- Paint your nails with a white nail polish. This will be your ghost.
- Once dry, grab a dotting tool (or the end of a bobby pin) and dip it into black nail polish. Add two small dots near the top of each nail for the ghost’s eyes.
- You can also add a tiny oval shape underneath for a spooky mouth.
- Top it off with a clear coat, and your ghost nails are ready to haunt the town.
This design is super simple, but it’s also a crowd-pleaser. You can even mix it up by adding different expressions to your ghosts.
Quick Tips to Nail Your Halloween Designs
Doing Halloween nail designs at home doesn’t have to be a hassle. But, if you’re like me, you might want some shortcuts to get them looking salon-perfect.
Here are a few tips:
- Use nail stickers if you’re not confident with freehand drawing. They’re easy, fast, and there are tons of Halloween-themed options.
- Go for gel polish if you want your design to last longer. Gel polishes are great for Halloween nails because they’re durable, and you won’t have to worry about chips.
- Try matte topcoat for a different look. Matte nails have a modern, edgy feel and can make your designs stand out even more.

More Simple Halloween Nail Design Ideas
If you’re feeling adventurous and want to try out different designs, here are a few more simple Halloween nail designs you can do at home:
1. Blood Drip Nails
This design is all about making your nails look like they’re dripping with blood – spooky, right?
- Start with a light base colour (white or nude works best).
- Use red nail polish and a dotting tool to create small dots near the tip of your nail.
- Connect the dots with vertical lines to make it look like the red is dripping down.
This design is simple but packs a punch.
2. Candy Corn Nails
Candy corn is a Halloween staple, and it makes for a super cute and easy nail design.
- Paint your nails with a white base.
- Add a stripe of orange in the middle of your nails.
- Finish with a yellow stripe at the tips, and you’ve got candy corn nails ready to go.
Candy corn nails are fun and bright, giving you a festive look without needing too much detail.
3. Glow-in-the-Dark Nails
Want your nails to stand out, even in the dark?
- Start with a black base coat.
- Add some glow-in-the-dark polish over the top.
- You can even draw little spooky faces or shapes before adding the glow coat.
These nails will light up any Halloween party.
How to Make Your Halloween Nail Designs Last Longer
Now, let’s talk longevity. You don’t want to spend all that time creating your Halloween nail designs at home, only to have them chip two days later.
Here’s how to keep them looking fresh:
- Always use a base coat. This helps the nail polish stick better and prevents staining.
- Apply a topcoat every few days. A topcoat will lock in your design and keep your nails shiny and chip-free.
- Avoid using your nails as tools. Opening cans or peeling labels can ruin your design, so be mindful.
Easy Halloween Nail Designs for Beginners
If you’re new to the world of DIY nail art, don’t worry. There are plenty of easy Halloween nail designs you can do at home that don’t require a lot of skill or fancy equipment.
Here’s a quick rundown:
- Simple bat silhouettes: Paint your nails black and add a few white bats using a toothpick or dotting tool.
- Glitter gradient nails: Use orange or purple polish and add black glitter to the tips for a cool ombre effect.
- Minimalist jack-o-lanterns: Paint your nails with a bright orange polish and draw a tiny black jack-o-lantern face on one nail for a fun accent.
Let’s dive deeper into how you can perfect simple Halloween nail designs at home.
Maybe you’re thinking: “I’ve got the basic designs down, but how can I make them pop? How do I take them to the next level?”
You’re in the right place.
I’m going to share more ideas, tips, and tricks so you can take your Halloween nails from simple to seriously spooky.
Elevating Your Simple Halloween Nail Designs
So, you’ve mastered the pumpkin nails and spiderweb designs, but there’s always room to push it a bit further. Even with simple Halloween nail designs at home, a few tweaks can give your nails a professional touch.
1. Add Texture with Matte and Glossy Finishes
You don’t need to stick to just one finish. Combining matte and glossy polishes can make your nails stand out.
Here’s how to do it:
- Paint your nails with a glossy black polish.
- Add some matte black spiderwebs using a thin brush. The contrast between the two finishes will make your design look more dimensional.
This trick works great with any Halloween design—ghosts, pumpkins, you name it. Adding texture gives that “I just left the salon” vibe.
2. Incorporate Metallic Accents
Metallic nail polish is the unsung hero of Halloween nail designs.
Imagine a spooky skull design with metallic silver accents or a pumpkin nail with a little gold glitter on the stem. It’s those small details that elevate your nails without adding extra complexity.
How to use metallic accents:
- Paint your nails with a dark base like purple or black.
- Add silver or gold accents using a dotting tool or a toothpick.
This is an easy way to make simple designs feel more advanced without the headache of intricate detailing.
Quick and Simple Halloween Nail Designs for Last-Minute Plans
Sometimes, Halloween sneaks up on you. You’ve got a party in a few hours, and your nails are still bare.
Here’s where these last-minute Halloween nail designs come in. They’re quick, easy, and still look festive.
1. Simple Black Cat Silhouette
This design is fast, but it looks impressive.
- Start with an orange base coat.
- Use a thin brush or toothpick to draw a black cat silhouette on one accent nail.
You don’t need to go crazy with detail; a simple outline of the cat sitting on your nail is enough.
2. Minimalist Moon and Stars
If you want a subtle nod to Halloween, moon and stars are your go-to.
- Paint your nails with a deep purple or black polish.
- Use a dotting tool or bobby pin to add white dots for stars.
- Add a crescent moon on one or two nails with a thin brush.
The minimalist approach is chic, and it works even after Halloween is over.
Tips for Keeping Your Halloween Nail Designs Intact
Once you’ve created your Halloween nail designs at home, you want them to last through the whole spooky season.
Here’s how to make sure your designs stay chip-free:
1. Reapply Your Topcoat Regularly
Even after you’ve finished your design, applying a fresh topcoat every two to three days can help protect it from chips and wear.
2. Avoid Hot Water Right After Painting
Hot water can cause your polish to lift or chip. After finishing your Halloween nail designs, give them time to fully dry and harden before doing the dishes or taking a hot bath.
3. Use Cuticle Oil to Maintain Moisture
Dry nails can lead to breakage, which ruins your design. Regularly applying cuticle oil will help keep your nails moisturised and your design intact.
Additional Simple Halloween Nail Designs to Try
If you’ve already nailed (pun intended) the ghosts and pumpkins, why not try these additional designs? They’re still easy to create, but they’ll give you that extra wow factor.
1. Bloody Drip Nails
If you want something a little creepier, bloody drip nails are a perfect fit for Halloween.
Here’s how:
- Start with a light base colour—white or nude works best.
- Use red polish and a dotting tool to create drips near the tip of the nail.
- Connect the dots with vertical lines to make it look like the blood is dripping down your nail.
It’s a simple design, but it gives that perfect Halloween horror movie vibe.
2. Candy Corn Gradient
If you want a sweet design without the spooky, candy corn nails are an excellent option.
- Paint your nails with a white base coat.
- Add a stripe of orange across the middle of each nail.
- Finish with a yellow stripe at the tips, and you’ve got a cute candy corn look.
This design is fun and festive, perfect for Halloween parties.

Using Nail Stickers for Quick Halloween Designs
Not confident in your freehand skills? Don’t worry.
Halloween nail stickers are your secret weapon. You can find all kinds of spooky designs—from bats to witches, and even jack-o’-lanterns.
Here’s how to use them:
- Paint your nails with a solid colour (black, orange, or white work best).
- Once your base coat is dry, apply the sticker to the desired nail.
- Seal it with a topcoat, and you’ve got instant nail art with minimal effort.
Stickers are the fastest way to create a professional-looking design when you’re short on time or patience.
FAQs
1. What are the easiest Halloween nail designs to do at home?
Some of the easiest designs include ghost nails, pumpkin outlines, and spiderwebs. These designs require minimal tools and are perfect for beginners.
2. Can I do Halloween nail designs without special nail tools?
Absolutely. You can use everyday items like toothpicks, bobby pins, or even tape to create simple Halloween designs. Nail stickers are also a great option if you don’t want to draw freehand.
3. What colours work best for Halloween nail designs?
Classic Halloween colours like black, orange, purple, and white are great choices. Adding a bit of gold or silver glitter can also make your designs pop.
4. How long will my Halloween nail designs last?
With proper care, including applying a topcoat every few days and avoiding hot water, your Halloween nail designs should last up to two weeks.
5. Are there quick Halloween designs for people with no nail art experience?
Yes! Nail stickers are the best option for beginners. Simply apply them to your nails and seal with a topcoat for instant Halloween nails.
